 Català (Catalan)
  Español (Spanish)
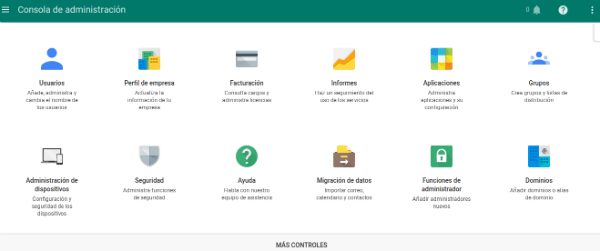
Following some queries I’ve received in the last few weeks, I start a series of articles by talking about the administration console of a Google apps for education. The truth is that it has a lot of possibilities and is worth investigating. I won’t do a complete tutorial because it would be endless and Google documentation is already quite good. I will only highlight a few aspects that I find particularly interesting and which, in some cases, are a little hidden.
Presentación

First of all, how to sign in: within the Google applications menu.
The console works basically at two levels: user level and device level. For the second level, basically Chromebooks, you have to pay a license of 23 € + VAT (today). It allows the same user level and some more hardware control features: microphone, camera… This license must be paid for each Chromebook you want to manage and paid only once for each computer.
I focus on the first level, the user level, which is totally free and functional for centers that have a Google apps for education domain. In the world of education, this level of user, if you have Chromebook computers, is not enough. Especially when we place restrictions on students. By creating a standard Gmail user, you can continue to use the machine and skip all restrictions. With teachers, the license is totally dispensable, from my point of view.
If our users don’t work with Chromebook but with Windows or Linux computers, then, logically, it only makes sense to work at the user level. However, users will need to log in to the Chrome browser. It’s not enough for them to log in to Gmail (or Drive…). You need to log in with your user using the Chrome browser configuration option. All policies defined in this console will then be applied.
In environments where students share computers and log on to Windows (or the corresponding Linux version) with a common user, it will be very difficult for them to start different browser sessions. You can also create a generic user in the console and configure all computers to log in to the Chrome browser, but then we can’t differentiate between students, and we won’t be able to use such interesting aspects as auditing.
Where should we start? First of all, we need to talk about users.
Users
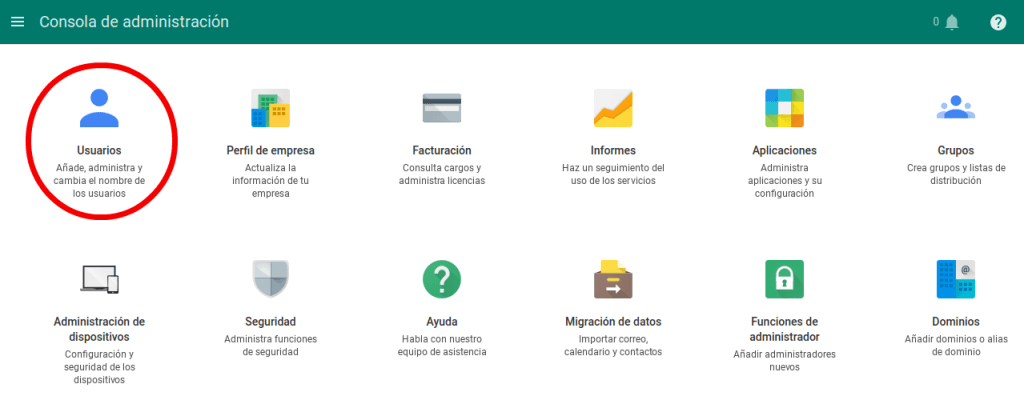
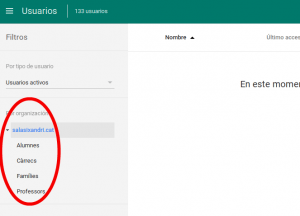
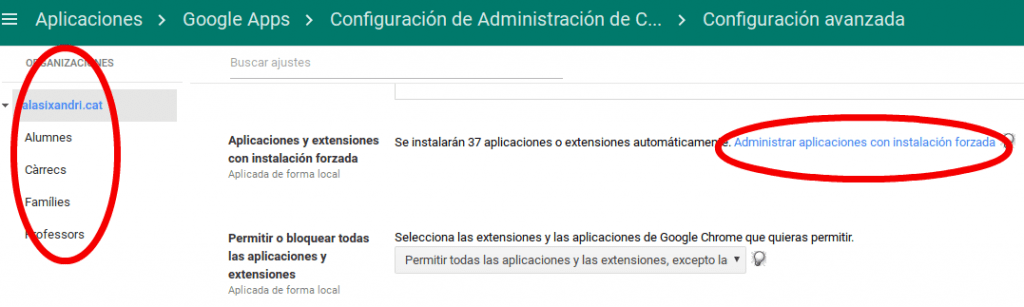
When you create users, either manually or by importing a file, it is essential to have created organizations (and if necessary, suborganizations). They are just categories of users. It will be in these categories where we can define the characteristics (restrictions, configurations…).
Depending on which organization we place a user in, will have permission to configure certain aspects or not, have a desktop background or other, have applications installed or others…
With the students it is very useful. From age restrictions to limiting only those students who do not know how to make responsible use.
Installing applications
A couple of years ago I already wrote an article explaining how to use this console to install applications in students’ (or teachers’) browsers. Taking advantage of this series of articles, I update the information, as it has changed and is a somewhat hidden option (if anyone knows a shortcut that explains it!
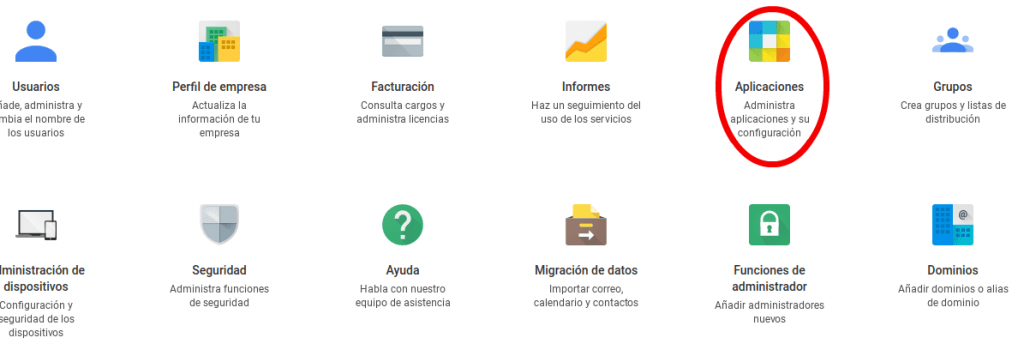
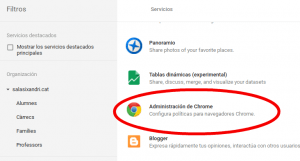
It is very useful that students do not have to install anything. And it’s even more useful that, with a couple of clicks, an application is automatically installed in the students. To do this, you have to find the option. It is a little hidden in the next section:
APPLICATIONS (you may need to click on the bottom, where it says MORE CONTROLS)
Afterwards, ADDITIONAL SERVICES

You have to go down options until you find CHROME MANAGEMENT
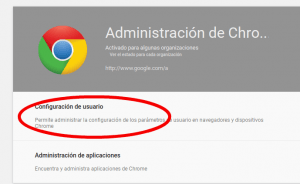
Choose USER CONFIGURATION
And finally, choose for which user organization you want to install and click Manage applications with forced installation
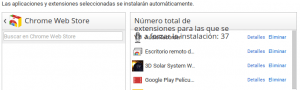
Finally, a window will open where you can search for applications in the Chrome Web store and add them to the selected user organization.
In future articles I will talk about other possibilities of this administration console.
